Markdownlint Configuration Guide: Unifying Your Team's Documentation Style
Why Do We Need Markdownlint?
Have you ever encountered this scenario: team members submit Markdown documents with wildly different formatting styles—some prefer two-space indentation while others use four spaces; some leave blank lines around headings while others don’t; some specify languages for code blocks while others leave them plain. This inconsistency not only affects readability but also creates unnecessary formatting diffs during code reviews.
Markdownlint was created to solve exactly this problem. It’s a specialized tool for checking Markdown file formatting standards that can:
- Unify formatting standards: Ensure all team members follow the same Markdown writing conventions
- Catch issues early: Discover formatting problems before publication, preventing display issues in production
- Improve reading experience: Consistent formatting makes documentation more readable and user-friendly
- Reduce code review overhead: Automated format checking lets reviewers focus on content rather than style
Using Markdownlint in Code Editors
VS Code Extension Installation
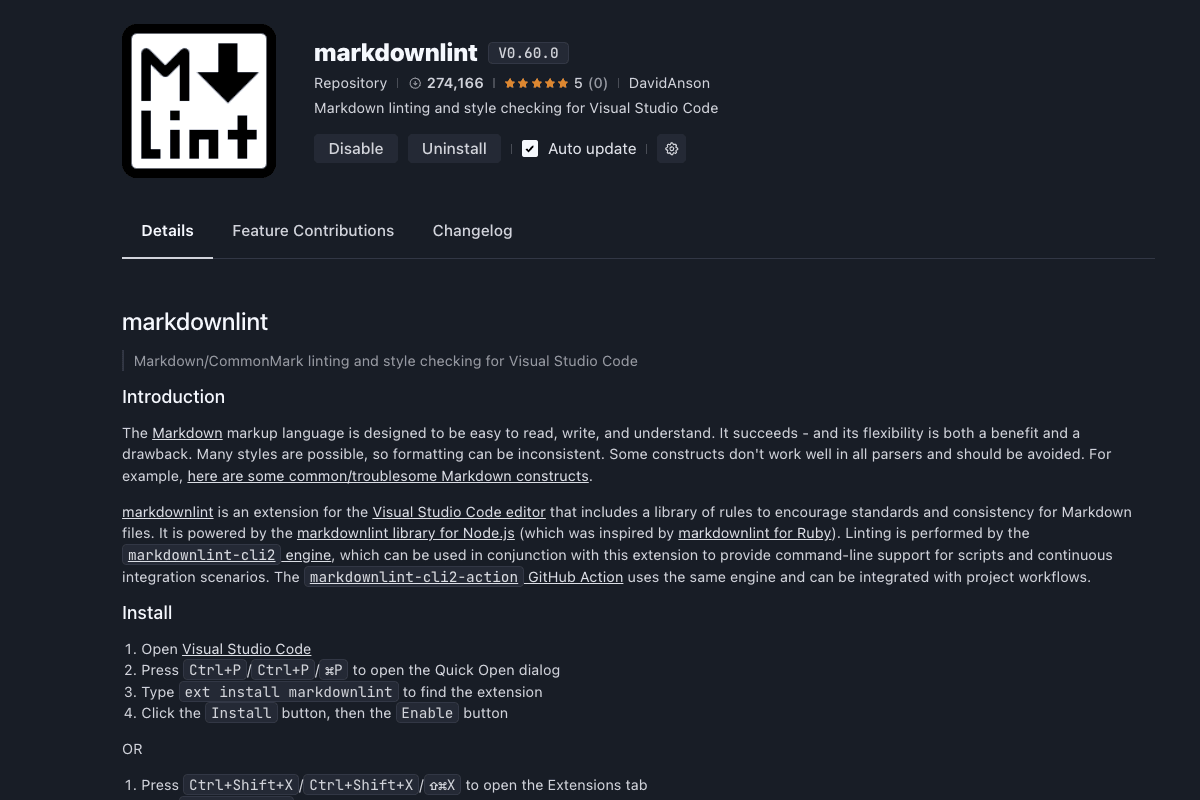
For daily writing, the most convenient approach is installing the markdownlint extension in VS Code:
- Open VS Code
- Open the Extensions panel (marketplace)
- Search for “markdownlint”
- Install the “markdownlint” extension (by DavidAnson)
Once installed, when you open Markdown files, the extension automatically checks formatting issues and displays green wavy underlines in the editor. Hovering over problem areas shows specific error messages and rule numbers.
Real-time Format Checking
The extension provides multiple ways to view and fix issues:
- Inline hints: Green wavy underlines appear below problematic code
- Problems panel: Press
Ctrl+Shift+M(Mac users pressCmd+Shift+M) to open the problems panel and view all formatting issues - Status bar display: The editor’s bottom status bar shows the current file’s issue count
- Quick fix: For auto-fixable issues, use
Ctrl+Shift+Pto open the command palette and run “markdownlint: Fix all” - Workspace checking: Run “markdownlint: Lint workspace” to check all Markdown files in the workspace
When you fix issues, the hints disappear in real-time, letting you immediately see the results of your changes.
Using Markdownlint from Command Line
markdownlint-cli vs markdownlint-cli2
When choosing command-line tools, it’s important to understand the differences between the two main versions:
- markdownlint-cli: The original command-line tool with relatively basic functionality
- markdownlint-cli2: The next-generation command-line tool with more powerful features and flexible configuration
Important Note: VS Code’s markdownlint extension uses the markdownlint-cli2 engine under the hood, so we recommend using markdownlint-cli2 in the command line as well for consistency. markdownlint-cli2 supports richer configuration file formats (.markdownlint-cli2.jsonc, .markdownlint-cli2.yaml, .markdownlint-cli2.cjs) and provides better performance and extensibility.
Global Installation
For scenarios requiring batch file checking or build process integration, command-line tools are more suitable:
# Install globally with npm
npm install -g markdownlint-cli2

# Or with yarn
yarn global add markdownlint-cli2

# Or with pnpm
pnpm add -g markdownlint-cli2
Basic Usage
After installation, you can check files with these commands:
# Check a single file
markdownlint-cli2 README.md

# Check multiple files
markdownlint-cli2 docs/*.md

# Check entire directory
markdownlint-cli2 docs/

# Recursively check all subdirectories
markdownlint-cli2 "**/*.md"
Common Command Options
# Auto-fix fixable issues
markdownlint-cli2 --fix docs/*.md

# Specify configuration file
markdownlint-cli2 --config .markdownlint-cli2.jsonc docs/*.md

# Output verbose information
markdownlint-cli2 --verbose docs/*.md

# Ignore specific files
markdownlint-cli2 --ignore node_modules docs/*.md
Custom Configuration: Creating .markdownlint-cli2.jsonc
Configuration File Basics
Markdownlint’s power lies in its highly customizable configuration system. You can flexibly adjust various checking rules based on your team’s writing habits and project requirements. Create a .markdownlint-cli2.jsonc file in your project root:
{
  "default": true,
  "MD003": { "style": "atx" },
  "MD007": false,
  "MD013": false,
  "MD022": false,
  "MD024": { "siblings_only": true },
  "MD025": false,
  "MD029": false,
  "MD031": false,
  "MD032": false,
  "MD033": false,
  "MD040": false,
  "MD041": false
}
Common Rules Explained
Let’s dive into several important rules:
MD003 - Heading Style
"MD003": { "style": "atx" }Enforces ATX-style headings (# Heading) rather than Setext-style (Heading\n====).
MD013 - Line Length Limit
"MD013": { "line_length": 120 }Limits maximum characters per line. Set to false to disable this rule.
MD024 - Duplicate Headings
"MD024": { "siblings_only": true }Allows identical headings in different sections, but prevents duplicate sibling headings.
MD040 - Code Block Language
"MD040": trueRequires code blocks to specify programming languages for better syntax highlighting.
Project-Specific Configuration Examples
Different project types may require different configurations:
Technical Documentation Project:
{
  "default": true,
  "MD013": { "line_length": 100 },
  "MD040": true,
  "MD041": false
}
Blog Project:
{
  "default": true,
  "MD013": false,
  "MD033": false,
  "MD041": false
}
Automation: Integrating into Development Workflow
Editor Automation
Modern editors typically support format-on-save functionality. In VS Code, you can configure workspace settings to enable automatic fixing on save:
{
  "editor.codeActionsOnSave": {
    "source.fixAll.markdownlint": true
  }
}
This configuration automatically runs markdownlint fixes every time you save a Markdown file, ensuring format compliance at all times.
Automated Fixing with Claude Code Hooks
Beyond editor plugins, we can leverage Claude Code Hooks for deeper automation. Hooks are user-defined shell commands that execute automatically at specific points in Claude Code’s lifecycle (e.g., after tool usage).
We can configure a PostToolUse hook to automatically run markdownlint-cli2 --fix after Claude edits or creates Markdown files. This ensures format consistency whether we’re manually editing or having Claude generate content.
Configuration Method:
Run the /hooks command in Claude Code, select the PostToolUse event, and add the following configuration. This hook matches all file write operations (Edit|MultiEdit|Write), parses the file path using jq, and executes the fix command if it’s a Markdown file (.md).
{
  "hooks": {
    "PostToolUse": [
      {
        "matcher": "Edit|MultiEdit|Write",
        "hooks": [
          {
            "type": "command",
            "command": "jq -r '.tool_input.file_path' | { read file_path; if echo \"$file_path\" | grep -q '\\.md$'; then markdownlint-cli2 --fix \"$file_path\"; fi; }"
          }
        ]
      }
    ]
  }
}
Through this approach, formatting becomes a seamless, automated part of the development process rather than something developers need to remember or manually trigger.
Git Hooks Tool Selection: Husky vs Pre-commit vs Simple-git-hooks
When configuring Git Hooks, multiple tools are available, each with pros and cons suitable for different tech stacks and team preferences.
| Tool | Primary Language/Ecosystem | Pros | Cons | Best Use Cases |
|---|---|---|---|---|
| Husky | JavaScript/Node.js | Powerful features, mature ecosystem, excellent experience with lint-staged | Slightly complex configuration, requires Node.js | Frontend projects, especially React, Vue, Astro |
| simple-git-hooks | JavaScript/Node.js | Lightweight, zero dependencies, simple configuration | Basic functionality, less mature ecosystem | Node.js projects prioritizing simplicity |
| pre-commit | Python | Good cross-language support, YAML configuration, not tied to specific ecosystems | Requires Python environment, less native for frontend | Multi-language projects, especially with Python, Go, Rust backends |
For pure frontend or JavaScript-centric projects, Husky is usually the best choice. For projects with multiple backend languages, pre-commit’s cross-language capabilities offer advantages. simple-git-hooks suits teams wanting lightweight toolchains.
Configuring Hooks with Husky
Husky is currently the most popular Git Hooks management tool for Node.js projects. It works perfectly with lint-staged to check only staged files.
1. Install dependencies:
pnpm add -D husky lint-staged2. Configure package.json:
{
  "scripts": {
    "postinstall": "husky install"
  },
  "lint-staged": {
    "*.md": "markdownlint-cli2 --fix"
  }
}
3. Create pre-commit hook:
npx husky add .husky/pre-commit "npx lint-staged"Configuration explanation:
lint-stagedonly checks staged files for better performancemarkdownlint-cli2 --fixautomatically fixes repairable issues- The
"postinstall"script ensures hooks are properly set up after each dependency installation
Configuring Hooks with simple-git-hooks
If you prefer a simpler, zero-dependency solution, simple-git-hooks is a good choice.
1. Install dependencies:
pnpm add -D simple-git-hooks2. Configure package.json:
{
  "simple-git-hooks": {
    "pre-commit": "pnpm exec markdownlint-cli2 --fix '**/*.md'"
  },
  "scripts": {
    "postinstall": "simple-git-hooks"
  }
}- The
"simple-git-hooks"object defines which commands execute at which hook triggers - The
"postinstall"script ensures hooks are properly set up after dependency installation
3. Update hooks:
Manually run pnpm postinstall once or reinstall dependencies.
Configuring Hooks with Pre-commit
To ensure all committed documents meet formatting standards, we can configure pre-commit hooks:
1. Install pre-commit:
# macOS
brew install pre-commit

# Or use pip
pip install pre-commit
2. Create .pre-commit-config.yaml:
repos:
  - repo: https://github.com/igorshubovych/markdownlint-cli
    rev: v0.37.0
    hooks:
      - id: markdownlint-fix
        args: ['--config', '.markdownlint-cli2.jsonc']
3. Install hooks:
pre-commit installCI/CD Integration
You can also integrate markdownlint checking into continuous integration workflows:
GitHub Actions Configuration
markdownlint-cli2 officially recommends using its dedicated GitHub Action markdownlint-cli2-action, which greatly simplifies configuration.
Create .github/workflows/markdownlint.yml in your project root:
name: Markdown Lint
on: [push, pull_request]

jobs:
  markdownlint:
    runs-on: ubuntu-latest
    steps:
      - uses: actions/checkout@v4
      - name: Run markdownlint-cli2
        uses: DavidAnson/markdownlint-cli2-action@v16
        with:
          # Optional: specify configuration file path
          config: .markdownlint-cli2.jsonc
          # Optional: fix discovered issues
          # fix: true
This workflow automatically runs markdownlint checks on every push and pull request, ensuring all code merged to the main branch meets documentation standards.
Through these configurations, we establish a complete documentation quality assurance system:
- Local development: Real-time editor hints + auto-fixing
- Commit stage: Git hooks automatic checking and fixing
- CI/CD stage: Automated checking prevents non-compliant content merging
Automation Flow Chart
This automation flow chart clearly shows the complete quality assurance loop from local development to continuous integration, ensuring documentation meets standards at every stage.
                    ┌─────────────────────────────┐
                    │   Developer Edits Markdown  │
                    └─────────────┬───────────────┘
                                  │
                                  ▼
                    ┌─────────────────────────────┐
                    │    Automated Fix Trigger    │
                    │  (On Save / After Tool Use) │
                    └─────────────┬───────────────┘
                                  │
                    ┌─────────────┴───────────────┐
                    │                             │
          ┌─────────▼─────────┐         ┌─────────▼─────────┐
          │   Editor Plugin   │         │   Claude Hooks    │
          │ (Format on Save)  │         │    (Optional)     │
          │  Real-time Check  │         │  Post-tool Fix    │
          └─────────┬─────────┘         └─────────┬─────────┘
                    │                             │
                    └─────────────┬───────────────┘
                                  │
                                  ▼
                    ┌─────────────────────────────┐
                    │    Developer Commits Code   │
                    │       (git commit)          │
                    └─────────────┬───────────────┘
                                  │
                                  ▼
                    ┌─────────────────────────────┐
                    │    Git Pre-commit Hook      │
                    │  (Husky/simple-git-hooks)   │
                    │    Final Format Check       │
                    └─────────────┬───────────────┘
                                  │
                                  ▼ (Check Passes)
                    ┌─────────────────────────────┐
                    │     Push to Remote Repo     │
                    │    (git push origin)        │
                    └─────────────┬───────────────┘
                                  │
                                  ▼
                    ┌─────────────────────────────┐
                    │     CI/CD Pipeline Trigger  │
                    │  (GitHub Actions/GitLab)    │
                    │    Final Quality Check      │
                    └─────────────┬───────────────┘
                                  │
                                  ▼
                    ┌─────────────────────────────┐
                    │    Deploy to Production     │
                    │   (Documentation Quality    │
                    │        Guaranteed)          │
                    └─────────────────────────────┘
Conclusion
Markdownlint is more than just a format checking tool—it represents an important practice of the “docs as code” philosophy in modern software development. Through unified documentation format standards, we can:
- Improve team collaboration efficiency: Reduce communication costs caused by formatting issues
- Enhance user experience: Standardized document formatting provides better reading experiences
- Build a quality culture: Elevate documentation quality to the same importance as code quality
- Achieve automated management: Use tooling to reduce manual intervention and improve work efficiency
In this information-rich era, high-quality documentation has become one of the key factors for project success. Tools like markdownlint help us build a moat of documentation quality, allowing technical teams to focus on creating value rather than getting bogged down in formatting details.
Starting today, configure markdownlint for your projects and make documentation standards your team’s common language.